

The problem isn't hanging art. The problem is the wall behind your couch won't cooperate. Maybe the sofa sits off-center. Maybe it's pushed into a corner. Maybe the corner walls are two different colors and you can't figure out which side to start on.
These 13 living room gallery wall ideas are built around sofa position — not abstract Pinterest grids. Every layout solves a real spatial problem. If your wall feels empty and awkward, one of these fits it exactly. For the complete picture, explore our full guide: Gallery Wall Ideas: 10 Picture Wall Designs for Every Room in Your Home.
The Inward Corner Gallery Wall — When Two Walls Meet Behind the Sofa
An inward corner is the concave meeting point where two walls tuck together. It's the most common corner gallery wall living room scenario, and the most mishandled. Most people treat it like a single flat wall. It isn't.
For anyone searching gallery wall ideas for corner spaces living room, this is the starting point: the inside corner creates a natural seam. That seam is either your biggest problem or your best design tool — depending on what you do with it. A corner photo gallery wall living room layout works the same way whether you're hanging prints, art, or family photographs across the seam.
For a full room-by-room approach to picture wall layouts, Gallery Wall Ideas: 10 Picture Wall Designs for Every Room in Your Home covers every configuration in detail. You'll find even more ideas in Staircase & Hallway Gallery Wall Ideas: 12 Small-Space Layouts That Make Narrow Walls Work.
Matching or Contrasting Frames Across a Two-Tone Paint Seam

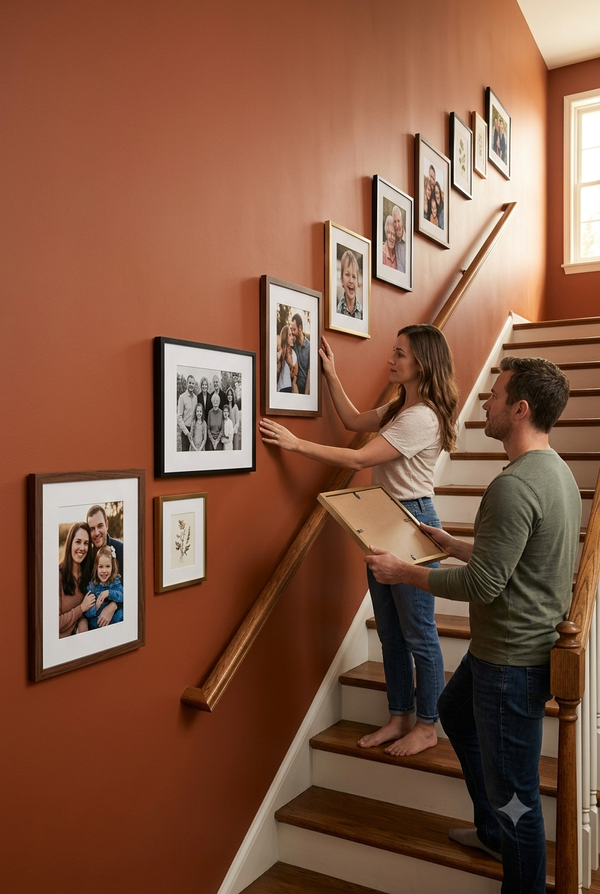
Two-tone walls — where each wall in the corner is painted a different color — are increasingly common. Warm terracotta on one wall, soft sage on the other. The gallery has to respond to that seam deliberately.
You have two options. Unify the frames across both walls using one finish (all black, all raw oak, all brass) so the gallery reads as one continuous display regardless of paint color. Or lean into the contrast: pair warm-toned frames with the warmer wall and cooler metal frames with the cooler wall, letting the seam become a deliberate visual break.
Matching frames across a two-tone seam creates cohesion; contrasting frames across it creates personality — pick one, commit fully, and don't mix strategies mid-gallery. The corner gallery wall living room eclectic look comes from leaning into contrast intentionally, not accidentally.
Which Piece Anchors the Seam — and the Spacing Rule as the Gallery Turns the Corner

The seam itself needs one piece straddling it. This is the anchor. Choose a horizontal artwork — minimum 16 inches wide — so half sits on each wall. It physically bridges the corner and signals that this is one gallery, not two.
From that anchor piece, maintain consistent spacing as you extend onto each wall. Use 2.5 inches between frames — not 2 inches, not 4. That half-inch difference matters when frames turn a corner. Tight spacing (under 2 inches) looks cramped at the seam; loose spacing (over 4 inches) makes the two walls drift apart visually.
The bridging piece is the single most important decision in a corner gallery — get it placed before you hang anything else.
The Outward Corner Gallery Wall — Wrapping a Pillar, Half-Wall, or Alcove Exterior
An outward corner is the convex edge — a wall that pushes toward you rather than folding away. Think a half-wall peninsula, a load-bearing pillar, or the exterior face of an alcove. This is the corner gallery wall living room modern scenario that almost no guide addresses.
The outward corner creates two wall faces pointing in different directions. Standard inward-corner logic doesn't apply here. You're wrapping art around an edge that points into the room.
How to Lay Out Frames Around a Convex Edge Without the Gallery Reading as Two Separate Walls

The risk on an outward corner is creating two completely unrelated clusters that happen to share a physical edge. Avoid this by keeping your largest piece close to the corner itself — within 6 inches of the convex edge on either side.
Use a consistent horizontal baseline across both faces. If your bottom row sits at 57 inches from the floor on the left face, it sits at 57 inches on the right face too. That shared baseline is the invisible thread that ties both sides together. A unified bottom line across an outward corner does more visual work than matching frame styles.
For small spaces, limit the outward corner gallery to three pieces per face — six total. More than that and each face starts competing with the other. A gallery corner living room layout like this works especially well in a corner gallery wall living room small spaces situation, where restraint matters more than volume.
Frame Depth and Protection on an Outward Corner That Gets Bumped Daily

An outward corner takes physical traffic. Frames here get brushed, knocked, and bumped far more than frames on a flat wall or inward corner. Frame depth matters practically, not just visually.
Choose frames with a maximum depth of 0.75 inches. Anything deeper catches passing shoulders and arms. Flat-profile metal frames ($25–$60 each) work well here. Avoid deep shadow-box frames ($80–$150) on an outward corner — they protrude and take damage.
Add clear adhesive corner bumpers (under $8 for a pack of 20) to the outer corners of every frame on a convex wall edge — they reduce wall scuffing and prevent frames from tilting after impact.
Gallery Wall Above an Off-Center Sofa — Centering the Art on the Couch, Not the Wall
Here is where every competitor gets it wrong. The living room gallery wall above couch advice you'll find everywhere tells you to make the gallery 60–75% of the sofa's width. That assumes the sofa is centered on the wall. Often, it isn't.
When a sofa sits off-center — pushed left or right of the wall's midpoint — centering the gallery on the wall creates a visual disaster. The art floats above empty cushion on one side.
Building the Gallery's Center Point From the Sofa's Midpoint — and What to Do With the Longer Blank Side

Start by finding the sofa's midpoint. Measure the sofa's total width and mark the midpoint above it on the wall. That mark — not the wall's center — is where your gallery's vertical center line sits.
Now you have a longer blank section of wall on one side. You have three options: leave it as intentional breathing room (works in minimal interiors), add a tall floor lamp or large plant to fill it (works in most styles), or extend the gallery asymmetrically toward that blank side while keeping the cluster's visual weight above the sofa.
The sofa's midpoint — not the wall's midpoint — is the only correct anchor for a gallery wall above an off-center couch.
A One-Side-Heavy Layout That Pulls Visual Balance Back Toward the Sofa

When a sofa sits in the left third of a wall, the room's visual weight pools on the left. A centered gallery above the sofa leaves the right wall feeling stranded. A one-side-heavy layout corrects this.
Build the gallery's heaviest cluster — largest frames, most pieces, darkest matte colors — above the sofa. Then extend one or two smaller pieces toward the blank wall side, decreasing in size as they move away from the sofa. This works especially well as a living room gallery wall family photos layout: group larger family portraits above the sofa, then taper to smaller individual photos or prints moving outward.
A gallery that tapers from heavy to light toward the empty wall side pulls the viewer's eye back to the sofa rather than toward the blank space.
Gallery Wall Around an L-Shaped Sectional Already Sitting in a Corner
An L-shaped sectional in a corner creates a genuinely different problem. The sofa itself occupies the corner, which means no single straight back edge exists to center a gallery above. This is the living room gallery wall above couch scenario that needs its own logic entirely.
Treating a sectional like a straight sofa produces a gallery that hovers awkwardly above the chaise and ignores the shorter straight-back section. Neither wall gets a complete layout.
Wrapping the Gallery Around the Chaise End Instead of Centering Above the Straight Back

The chaise end of a sectional typically extends further into the room than the straight back. That extension point — where the chaise ends — is your layout anchor, not the midpoint of either wall.
Start the gallery on the wall behind the straight back, beginning from the inside corner and working outward. Let the gallery follow the L-shape of the sofa by placing a vertical column of three or four smaller frames (8x10 inches each) on the wall above the chaise's outer edge. This follows the furniture's actual shape rather than ignoring it.
On an L-shaped sectional, hang art above where the body actually sits — not above where a straight sofa hypothetically would sit.
Handling the Height Mismatch Between the Armrest Side and the Back-Cushion Side of a Sectional

A sectional's back cushion height averages 36–38 inches. The armrest end sits at 24–28 inches. That 10-inch drop creates an uneven upper edge across the wall.
Use the back-cushion height to set your gallery's bottom edge on the straight-back wall. On the chaise wall, drop the bottom frame edge by 4–5 inches to follow the lower armrest height. Stagger the frame heights in descending order as the gallery moves from the back-cushion wall toward the chaise wall — this mirrors the sectional's own stepped profile.
Mirroring the sectional's height drop in your frame sequencing makes the gallery and furniture read as one designed unit rather than two separate decisions.
Living Room Gallery Wall Around a Mounted TV — Making the Screen Part of the Display
Mounting a TV above a sofa is controversial in design circles. Mounting one and then adding a gallery wall around it is even more complex. But when handled correctly, a living room gallery wall around tv layout — or a living room gallery wall TV layout, depending on how you search it — can make the screen look intentional rather than intrusive.
The mistake is treating the TV like an oversized frame. It isn't. It has depth, a bezel, visible ports, and a power cord. Any approach that tries to border or mat the screen will fail.
Using a Floating Ledge So the TV Reads as Part of the Gallery, Not a Framed Picture

A floating timber ledge (pictured: solid oak, 2-inch depth, $60–$120 for a 48-inch span) installed 4–6 inches below the TV creates a visual platform. It gives the TV a base — the same role a frame gives a painting.
On the ledge, place one or two small leaned frames plus a single three-dimensional object — a sculptural vase, a stacked book set, a small plant. This mix of flat and three-dimensional elements visually connects the shelf's horizontal line to the gallery frames mounted on either side of the TV.
The floating ledge beneath a TV does what no amount of surrounding frames can do — it anchors the screen at its base and makes it sit inside the gallery rather than hover above it.
Symmetric vs. Asymmetric Frame Placement When the TV Isn't Centered on the Sofa

If the TV is centered above the sofa, symmetric clusters on either side work cleanly. Match frame count and total surface area on both sides. Two frames left, two frames right. Balance is obvious.
When the TV sits off-center above the sofa — or the sofa itself is off-center — asymmetric placement is more honest. Place a larger cluster of three to four frames on the side with more open wall space. Use one or two frames on the tighter side. The visual weight of the larger cluster compensates for the spatial imbalance.
Never try to force symmetry around an off-center TV — asymmetric clusters acknowledge the real geometry and look deliberate instead of strained.
Living Room Gallery Wall With a Mirror or Floating Shelves Built Into the Layout
Mirrors and shelves get added to gallery walls as afterthoughts. A frame here, a shelf there, a mirror squeezed in at the end. That approach produces a cluttered, unresolved wall. Both a living room gallery wall with mirror and a living room gallery wall with shelves work best when the mirror or shelf is the first decision — not the last.
Treat them as structural anchors. The rest of the gallery arranges itself around them.
Sizing and Placing a Mirror as the Gallery's True Anchor Piece — Not an Afterthought

For a mirror to lead a gallery layout rather than float within it, it needs to be at minimum 40% of the total gallery cluster's width. A gallery spanning 60 inches needs a mirror at least 24 inches wide. Smaller than that and the mirror reads as just another frame.
Place the mirror left of center within the cluster — not dead center. Centering a mirror makes the layout feel too formal. Off-center placement (roughly one-third from the left edge of the full gallery) lets the surrounding frames balance it asymmetrically, which reads as more collected and natural.
A mirror placed off-center in a gallery wall creates visual tension that makes the whole layout feel considered rather than assembled from a kit.
If you want your gallery to feel collected over time rather than bought all at once, the Vintage-Inspired Gallery Wall Ideas: 12 Collected Looks That Feel Timeless, Not Trendy guide covers exactly that layered approach.
Styling a Floating Shelf Inside the Gallery — Leaned Frames, Objects, and Depth Layers

A floating shelf inserted into the middle of a flat-art gallery introduces physical depth. The shelf should sit at roughly eye level — 56–60 inches from the floor — so objects on it are visible from a seated position.
On the shelf, lean one or two small frames (5x7 or 4x6 inches) rather than hanging them. Add one three-dimensional object — a ceramic, a small brass figurine, a trailing plant in a 3-inch pot. This combination of flat leaned art and dimensional objects creates a depth layer the surrounding hung frames cannot replicate.
The rule for a gallery shelf is: never style it with only flat art — one three-dimensional object on a shelf does more spatial work than three extra framed prints.
The Maximalist Full-Wall Takeover — Salon-Style Floor-to-Ceiling Above the Sofa

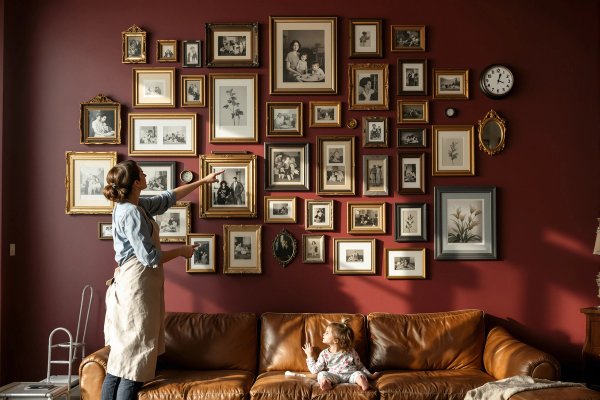
The 13th layout is not a contained cluster above the sofa. It is the entire wall. Salon-style, floor-to-ceiling, edge-to-edge. This is maximalist decor at its most committed, and it works because it removes all the decisions about where the gallery ends.
Start by hanging one large anchor piece at eye level — 57 inches to the center from the floor. Build outward and upward from there, filling in gaps with smaller frames. The bottom row sits 6–8 inches above the baseboard. The top row sits 8–10 inches below the ceiling crown molding. No frame should touch either.
Use a mix of frame sizes: at least 30% of frames should be 16x20 inches or larger. This prevents the wall from reading as a scatter of small squares. Frame finishes can mix freely in a salon-style layout — black, gold, natural wood, and white frames can coexist — but limit the mix to three finishes total.
A full-wall salon layout works because it commits completely — it's the half-finished, three-frames-in-a-cluster approach that looks empty, not the floor-to-ceiling one.
Frequently Asked Questions
How high should a gallery wall be above a sofa?
The bottom edge of the lowest frame should sit 6–8 inches above the sofa's back cushions. This applies whether the sofa is a straight two-seater or an L-shaped sectional's straight-back section. Any lower and frames feel like they're pressing down on the furniture. Any higher and the gallery disconnects from the sofa entirely.
Can you do a gallery wall in a corner behind a sofa?
Yes — but you need to decide which corner type you have. An inward corner (where two walls meet) needs a bridging piece straddling the seam. An outward corner (a pillar or half-wall edge) needs a shared horizontal baseline across both faces. Treating both types identically is the most common corner gallery wall mistake.
How many pieces do you need for a gallery wall above a sofa?
A contained cluster above a standard three-seat sofa (84 inches wide) typically needs 7–12 pieces to fill well without looking sparse. Fewer than seven pieces tends to read as scattered art rather than a gallery. For a full salon-style wall takeover, you need a minimum of 20 pieces to cover the wall without obvious gaps.
A gallery wall solves the empty wall problem in a way a single large painting never can — it adapts as your furniture moves, your tastes shift, and your collection grows. Every layout here is designed to start with where your sofa actually sits, not where a formula says it should.
Comments